
Setting Up iCloud Family Sharing Isn't Easy, but It's Worth It
If you didn’t already know, Apple has a way for families to share their iTunes and App Store purchases. Introduced with iOS 8, the feature allows you to share photos, calendars, reminders, and more with one another. More importantly, it allows you to share iTunes, iBooks, and App Store purchases. If you haven’t set up your household on Family Sharing, let’s look at how it’s done.
Setting up Family Sharing in iOS
One thing to be aware of before you devote yourself to Family Sharing. According to Apple, “Your credit applies only to your account. If you use Family Sharing, other family members can’t make purchases with your credit.” The same applies to promo codes.
The first thing you need to do is open the Settings app under iOS 10.3.1 from your main iOS device. Then, tap on your iCloud account at the top of the screen.
Once your iCloud settings finish loading, you’ll see a link labeled Set Up Family Sharing. Go ahead and tap that.
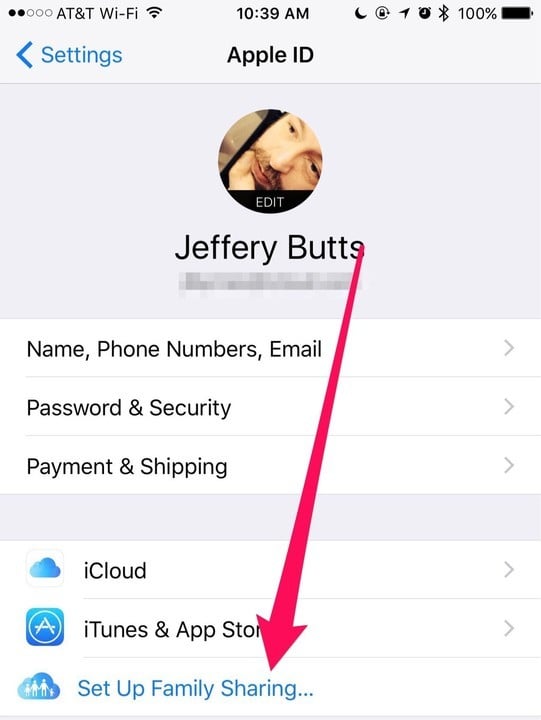
Tap Set Up Family Sharing
The next screen introduces you to Family Sharing, explaining what it can do. Go ahead and tap on Get Started.
Next, you’ll be invited to your role as the Family organizer. You can tap Continue once you’ve read the details.
After that, there will be more to read about sharing purchases. When you’ve finished reading it, tap Continue.
Now you’ll be asked to verify your payment method. You will be responsible for all purchases made, so read this carefully. You should use Ask to Buy for children in your household under the age of 18 to protect your financial stability.
You can choose to share your location using Find My Friends or not. This is a great feature for making sure your loved ones are safe and sound, but the choice is yours.
Your Family Sharing account is set up now, and you’re ready to add new members of your household.
Add Your Loved Ones to Family Sharing
From the Family Sharing page in your iCloud settings, you’ll see an option that says “Add Family Member.”
To add someone to your Family Sharing account, tap Add Family Member. You’ll also see your payment method, so now might be the time to confirm or edit that.

Tap Add Family Member
Next, you’ll get a screen to enter your family member’s Apple ID. Go ahead and do so, then tap Next. You’ll also see an option here to create an Apple ID for your child, if he or she doesn’t already have one.

Enter the Apple ID and tap Next
You can choose to have the new member enter a password, or you can send them an invitation. If they’re with you, just have them enter the password for their Apple ID. Otherwise, choose to send them an invitation, and they’ll get a link to click to join the Family Sharing account.
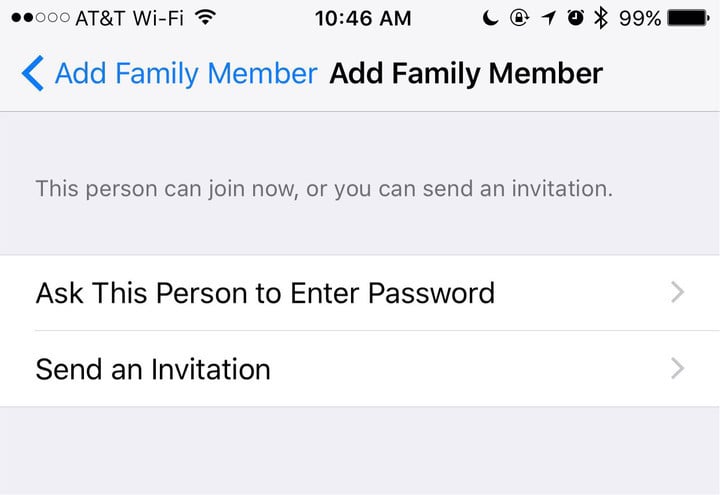
Choose to enter the Apple ID password or send a link
Next, you’ll be asked to confirm the account that wants to share purchases. Make sure you’ve entered the correct Apple ID, and then click Next.
It’s Terms and Conditions time. Read it, then tap Agree at the bottom right corner and then again in the popup that appears. The same share location option will appear as when you first set up Family Sharing, so choose whether or not to enable it and tap Next.
Repeat these steps for each additional family member.
Family Sharing is Set Up
Once you’re done, every person in your household should have their own Apple ID, but they’ll be able to download purchases under a “master” account from iTunes, iBooks, and the App Store.