
Sharing Instagram Stories: Tips and Tricks You Should Know
Instagram had long been an immensely popular app for sharing photos and videos on one’s feed and profile grid. But in August 2016, it launched a feature that would prove successful in further boosting its popularity: Instagram Stories, which allows users to share — separately from their feeds and profile grids — photos and videos that, as with Snapchat’s own Stories, disappear after 24 hours. Instagram Stories had become such a huge hit that, just five months after its introduction, it had reached as many as 150 million users. If you’re one of those users, or if you want to add to that already impressive number, you might want to check out the tips and tricks we’ve compiled below to enhance your experience with sharing Instagram Stories.
Download Instagram for free

Know thy camera modes

To start sharing a photo or video to your story, tap the camera icon at the top left of the home feed or just swipe right anywhere in the feed. You can choose from any of the available camera modes by tapping the name of the mode you want to choose or by swiping left or right at the bottom of the screen, and then use the circular capture button to take a photo or record a video:
- Normal: In this mode, tap the capture button to take a photo, or tap and hold to record a video.
- Boomerang: In this mode, tap the capture button to take a burst of photos that are automatically stitched together to form a GIF-like animated image that loops back and forth.
- Hands-Free: This mode is so called because in it you don’t have to tap and hold to record a video. You just need to tap the capture button to start recording and tap again when you’re done (or else wait for the maximum allowed recording time to elapse).
- Live: Technically, this mode doesn’t let you share a photo or video to your story. Rather, it lets you broadcast a live video, which disappears as soon as it ends.
After capturing a photo or video, you can finish sharing it to your story by tapping the plus icon labeled Your Story.
Zoom in and out
Before taking a photo or recording a video, you can pinch in and out on the camera screen to zoom in and out to frame your shot just the way you like it. You can also zoom while recording a video.
In Hands-Free mode, just also pinch in and out. Pinching, of course, requires two fingers, which makes Hands-Free mode even less hands-free than it normally is.
In Normal mode, you don’t need two fingers to do some pinching to zoom while recording a video. After tapping and holding with one finger to start recording, you just have to slide up or down using that same finger to zoom in and out.
Switch cameras with ease
Before taking a photo or recording a video, you can switch between the front and rear-facing cameras by tapping the icon with the two circular arrows or by simply double-tapping on the screen. You can also tap the said icon or double-tap on the screen to switch between the front and rear-facing cameras while recording a video.
Don’t be afraid of the dark
When your device detects low-light conditions, the camera screen automatically shows a crescent moon icon. Tap this icon to take better, or at least brighter, photos and videos in the dark.
Share what you already have, including Snaps

If you think that Instagram Stories allows you to share only photos and videos that you take right within the app, then you’re mistaken. On the contrary, you can upload photos and videos that you already have on your device’s library, as long as they’re taken in the last 24 hours — including the Snaps you’ve saved from Snapchat. You just have to know how to access them for your Instagram Stories.
Well, to do that, just swipe up or down on the Instagram Stories camera screen and then select a photo or video from your device’s library.
Turn Live Photos into Boomerang videos

A Live Photo is a GIF-like image that’s generated by supported iOS devices (iPhone 6s and later) by capturing the 15 seconds of motion before and after a still photo is taken, and then stitching them together with the still itself into one continuous animation. To create a Live Photo, open the Camera app, make sure Live Photo capture is turned on by tapping the icon with the concentric circles at the top of the screen, and tap the circular capture button at the bottom.
Want to share a Live Photo taken in the last 24 hours to your Instagram Stories? You can by turning it into a Boomerang video.
On the Instagram Stories camera screen, swipe up or down and select a Live Photo from your device’s library. 3D Touch on the full-screen preview, or just tap and hold if your device is not 3D Touch-enabled, until a loading wheel appears. The word “BOOMERANG” will be displayed as soon as Live Photo-to-Boomerang conversion is complete for your story.
Make your story look better with the right filter
Ninety-nine percent of the time, the photos or videos you take in the camera screen, or even the ones you upload from your device’s library, for Instagram Stories won’t look as good as you want them to. Fortunately, you can swipe left or right on a photo or video after it’s captured or uploaded to switch between the available filters and find the look you prefer.
Have fun with stickers

Before sharing a photo or video to Instagram Stories, you can spruce it up with some stickers. Just tap the smiley sticker icon at the top of the screen to access the available stickers, including hats, glasses, seasonal items, emoji, and more.
You can add a sticker with your location by selecting or searching for nearby locations. After choosing a location, you can tap the location sticker to change its color and opacity. Anyone who views the photo or video in your story can tap the location sticker to see the Instagram page for the location.
You can also add a sticker that indicates the current time where you are. Tap the sticker to change its appearance.
Another type of sticker that you can add is one that shows the current weather conditions at your current location. Tap the sticker to change its unit of temperature (Fahrenheit or Celsius) and appearance.
Use two fingers to rotate and resize a sticker. Drag a sticker to place it where you want it to be. If you change your mind and decide not to use a sticker, just drag and drop it onto the trash bin icon at the bottom of the screen to remove it.
Get creative with drawings and colors

Before sharing a photo or video to Instagram Stories, you can draw on and add some color to it to make it more interesting. Just tap the marker icon at the top of the screen to access the drawing tools.
By tapping any of the icons at the top of the screen, you can choose the marker, chisel-tip, or neon brush.
Adjust the line thickness by tapping the three dots at the bottom left and swiping the slider.
Select a color to draw with by tapping any of the color circles at the bottom of the screen. Swipe left or right to see more color circles to choose from. Tap and hold a color circle to bring up the color spectrum and swipe across it to choose a custom color.
If you want to undo a stroke or any other action, tap Undo at the top left. When you’re done, tap Done at the top right.
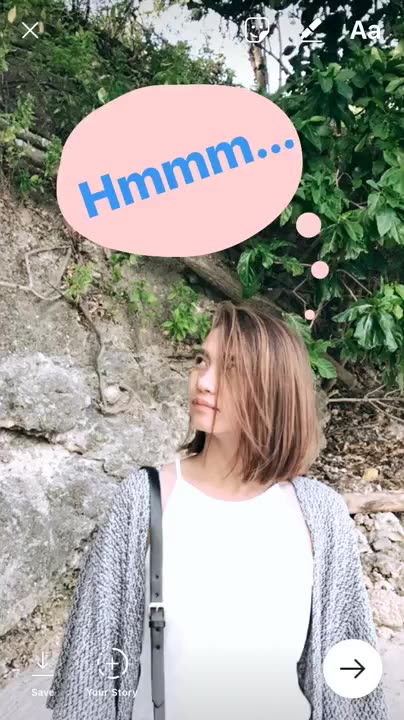
Say what you want to say

Before sharing a photo or video to Instagram Stories, you can add text to sort of caption it or otherwise label certain parts. Just tap the “Aa” icon at the top of the screen, or simply tap anywhere on the photo or video, to access the text tool.
Enter text and emoji using the keyboard. Adjust the text size by tapping the three dots at the top of the keyboard and swiping the slider. (You can also make the text smaller or bigger by pinching the text in or out.)
Select a text color by tapping any of the color circles at the top of the keyboard. Swipe left or right to see more color circles to choose from. Tap and hold a color circle to bring up the color spectrum and swipe across it to choose a custom color.
Use two fingers to rotate and resize a text block. Drag a text block to place it where you want it to be. If you change your mind and decide not to use a text block, just drag and drop it onto the trash bin icon at the bottom of the screen to remove it.
Tap the “Aa” icon again to add another text block.
Mention someone in your story
Using the text tool, you can mention someone in your story by typing @ followed immediately by their username and then selecting the user you’d like to mention from the options that appear.
When you mention someone in your story, their username will appear in your story with an underline, effectively signifying a tappable link. Anyone who view your story can tap the username to go to the profile of the mentioned user.
You are allowed to mention up to 10 users in each photo or video you share to your story. Any person you mention in your story will receive a direct message from you that says you’ve mentioned them in your story and shows a preview of the story where they’re mentioned, which disappears along with the story itself after 24 hours.
Share the sound of music, or the sound of silence
Want to enliven your Instagram Stories with videos that have music of your choice playing in the background? Well, you can. Just open the Music app, Spotify, or practically any music player app; play the track you want for your video; open Instagram; and record your video using the Instagram Stories camera. The recorded video will then have your selected song playing on its soundtrack.
But what if you don’t want your video to have any sound, musical or otherwise? After recording or selecting a video for your story, you can opt to share it sans audio by tapping the speaker icon at the top of the screen.
Hide your story from specific users
Within the 24-hour lifespan of each of the photos and videos you share to it, your story is visible to anyone if your account is public or only to your approved followers if your account is private. Either way, you can choose to hide your story from specific users for whatever reason. For example, if your folks are following your account but you don’t want them to see your tomfoolery as ephemerally documented in the photos and videos you’re posting to your story, you might want to hide your story from them.
To hide your story from specific people, open the Instagram Stories camera screen, tap the gear icon at the top left, tap Hide Story From, search for and select the users you’d like to hide your story from, and then tap Done.
Choose who can reply to your story

By default, anyone who can view your story can reply to it via direct message by tapping the Send Message option. However, you can set your story so that only people you follow are able to reply to it or prevent anyone from replying to it altogether.
To control who can reply to your story, tap the gear icon at the top left of the Instagram Stories camera screen and then tap an option under the heading Allow Message Replies:
- Everyone: Anyone who can see your story can reply to your story.
- People You Follow: Only people you follow can reply to your story.
- Off: No one at all can reply to your story.
After making your choice, tap Done.
If you’ve prevented people you don’t follow or all users from replying to your story, they will not see the Send Message option. Disabling replies, either partially or completely, is particularly recommended to users with a large following, such as celebrities, brands, and so-called influencers.
If you have any questions, remarks, or suggestions, feel free to enter them in the comments section below.
Download Instagram for free