Your Apple Pay Setup Can Really Speed Up Your Shopping Experience
Purchasing things from websites and apps using Apple Pay is very convenient. Arguably, it’s also safer from a privacy standpoint, since your actual credit or debit card information is never transmitted to the seller. Probably the biggest reason for using it, though, is convenience – not having to enter in your credit or debit card information every time you make a purchase. What would make the service even more convenient would be if Apple Pay could also automatically fill in your contact and shipping information. Oh wait, it can. Let me show you how to configure your Apple Pay setup with this information.
Your Apple Pay Setup Defaults
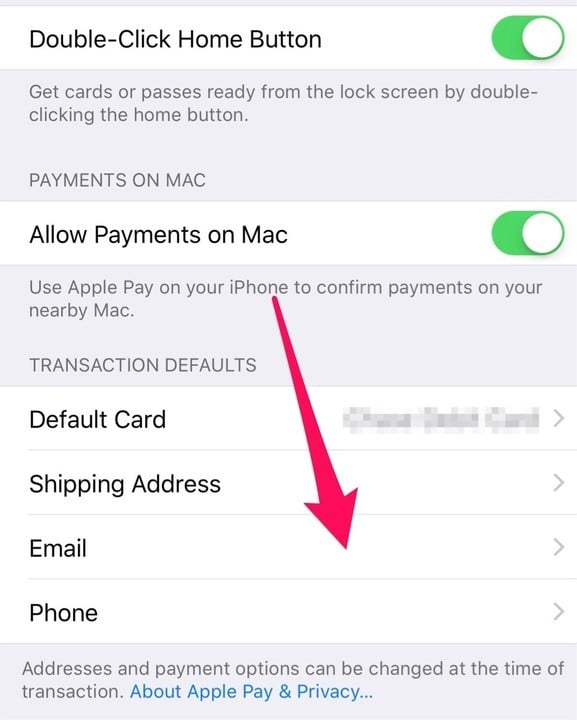
Within the Settings app, you can configure several default settings for Apple Pay. Chances are, you never noticed that you could change any of the Apple Pay setup here, because adding a credit or debit card doesn’t require you to go there. You can set a default shipping address, email address, and phone number.
To get started, launch the Settings app and then tap on Wallet & Apple Pay.

To set your default address, tap on Shipping Address.

You can choose an address from Contacts, or enter a new one. On this screen, you should tap one of the addresses shown or tap Enter New Shipping Address and fill out the form. You can also tap Ad from Existing Contact if the shipping address you want to use is listed under someone else’s name. Once you’ve finished this, tap Wallet & Apple Pay in the top left corner to go back to the main preferences page.

Next, let’s configure the default email address. Tap on Email to do that.

Like the settings page for your shipping address, you can choose an email address already displayed or enter a new one. You can also choose an email address from another contact. Once you’ve done this, tap Wallet & Apple Pay in the upper right corner of the screen to go back.

Now, we will set up a default phone number. Just tap Phone to get started.

By now, I think you probably know the routine. Tap a phone number displayed, or tap Add Phone Number to enter a new one. Once again, you can also use a phone number from an existing contact. When you’re done, tap Wallet & Apple Pay in the top left corner to make sure your changes are saved. Then you can close the Settings app.

Enjoy Less Typing and More Shopping
Now that you’ve configured your Apple Pay setup with this information, web sites and apps that are built to take full advantage of everything the service offers shouldn’t ask you for the personal data. You can breeze through checkout quickly and easily, with almost no typing.
For recent news about Apple Pay, check out the following:


