
Are You Using A Password Manager Yet?
Remember when it was perfectly fine for you to have the same password for virtually all of your online accounts? When it was all right to have a password that contained your birthday, your pet’s name, the digits “1234,” and even the word “password”? Remember when you didn’t even know what a password manager was?
The typical list of requirements for passwords is sounding more and more like a recipe for spell-casting and witchery
Indeed, gone are the days when making our online passwords strong and unique was among the least of our worries. In this day and age, when data breaches have become commonplace occurrences, you’d be hard-pressed to find a security-conscious website that wouldn’t require you to have a password that contains a number of things such as eye of newt, toe of frog, wool of bat, tongue of dog, adder’s fork, blind-worm’s sting, lizard’s leg, and owlet’s wing.
Just kidding. Those are, of course, the ingredients of the spell brewed by the three witches in Shakespeare’s “Macbeth.” But if we’re being honest, we can say that the typical list of requirements for passwords, which suggests mixing letters, numbers, symbols, and others, is sounding more and more like a recipe for spell-casting and witchery.

Fortunately, you need not resort to witchcraft and wizardry to be able to meet the demands of having strong and safe passwords. You don’t even need Post-its, notebooks, and a great memory to keep track of your passwords. All you need is a little bit of “automagic” in the form of an effective password management system.
In this AppAdvice Guide, we’ll walk you through the rudiments of password management. Along the way, we’ll show you the nuts and bolts along with the pros and cons of a couple of the most popular password managers available today, one of which is Apple’s very own and the other a third-party solution.
It’s our hope that by the end of this guide, you’ll have been convinced of the benefits of using a password manager and well-informed to choose the password manager that will work for you.
So without further ado, let’s proceed. For now, no password required.
Speak friend and enter
iCloud Keychain by Apple
Unbeknown to many, Apple offers iOS and Mac users its very own password management system. You could be forgiven for being unaware of this system, though, since it’s all but invisible. It’s called iCloud Keychain, and it’s built right into Apple’s iOS and Mac platforms. Oh, and it’s totally free to use.
Officially launched on iOS 7.0.3, iCloud Keychain is essentially a database where website login credentials, credit card details, and even Wi-Fi passwords can be stored for quick access, mainly via autofill in Safari. These pieces of data and information are securely stored in iCloud Keychain using 256-bit AES encryption and are synced across user-approved devices only.
Getting started with iCloud Keychain
Don’t go looking for an app called iCloud Keychain to start using iCloud Keychain on your iPhone, iPod touch, or iPad. You won’t find such an app, since iCloud Keychain doesn’t have a dedicated app. Rather, you can enable iCloud Keychain through the setup assistant during the initial setup of your iOS device or by following these steps.
How to enable iCloud Keychain on iOS

Launch the Settings app from the home screen of your iOS device.

Scroll down to the option labeled iCloud and tap it.

If you’re already signed in, proceed to the next step.
If you’re not yet logged in, sign in with your Apple ID. If you don’t have an Apple ID, tap the “Create a new Apple ID” button and follow the onscreen instructions. After signing in, you’ll be prompted to merge the Safari data, reminders, and contacts on your device with iCloud, and to allow iCloud to access your device’s location.

Scroll down to the option labeled Keychain and tap it.

Tap the switch to turn on iCloud Keychain.
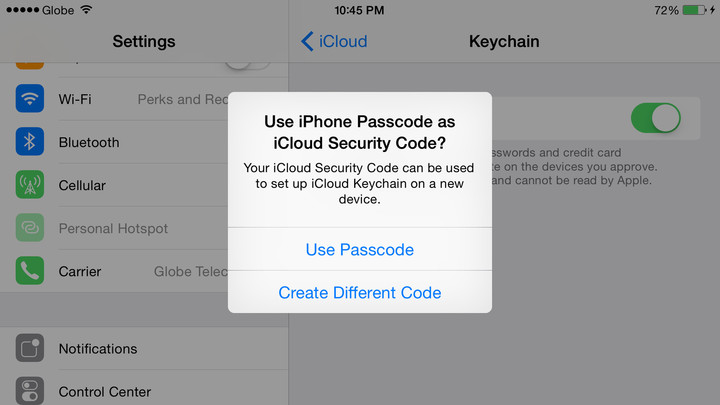
You’ll be prompted to create an iCloud Security Code.
What is an iCloud Security Code? An iCloud Security Code is used primarily to authorize the setup of iCloud Keychain on additional devices.
You can create an iCloud Security Code by using the same code as the one you’re using to unlock your device or by assigning a new code. If you choose to do the former, tap “Use Passcode” and then enter your device passcode. If you decide on the latter, tap “Create Different Code” and then enter your preferred code.
When creating a different code, you can assign a simple four-digit code. Or you can tap “Advanced Options” to use a complex code made up of alphanumeric characters and symbols, use a randomly generated code, and choose to not create a security code at all.
If you don’t create a security code, your keychain data will be stored locally on the device and updated across your approved devices only — your data will not be backed up in Apple’s servers aka the cloud. Consequently, you will not be able to use your saved passwords if you lose all of your devices that use iCloud Keychain.
Your iCloud Keychain is now set up on your iOS device. If you want to turn off new device approval using your security code, change your security code, or change your verification number, tap Advanced in the Keychain section of the iCloud settings.

The main draw of iCloud Keychain is that it makes logging in to websites and filling out forms quick and easy. But here’s the thing: It works only with Safari, Apple’s built-in Web browser. And you won’t get to actually take advantage of iCloud Keychain until you enable autofill, the Safari feature that automatically fills (hence the name) data in webpage forms without you’re having to type information in its entirety.

How to enable Passwords & AutoFill for Safari
Launch the Settings app from the home screen of your iOS device.
Scroll down to the option labeled Safari and tap it.
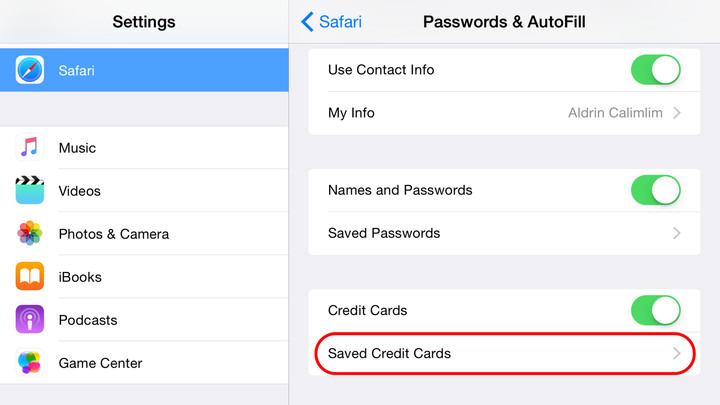
Find the option labeled Passwords & AutoFill and tap it.
Tap the switches for Use Contact Info, Names and Passwords, and Credit Cards to turn them on.
Saving passwords in iCloud Keychain
Now that you’ve taken care of the nitty-gritty of setting up iCloud Keychain, the next point of consideration is the process of saving passwords in the system. It’s actually a very short process, whether you’re saving a password for an existing account or a new one. Just be sure you’re in the right place: Safari.
If you’re signing in to an existing account, enter your login details and then tap Save Password on the pop-up menu to save your credentials in your iCloud Keychain.

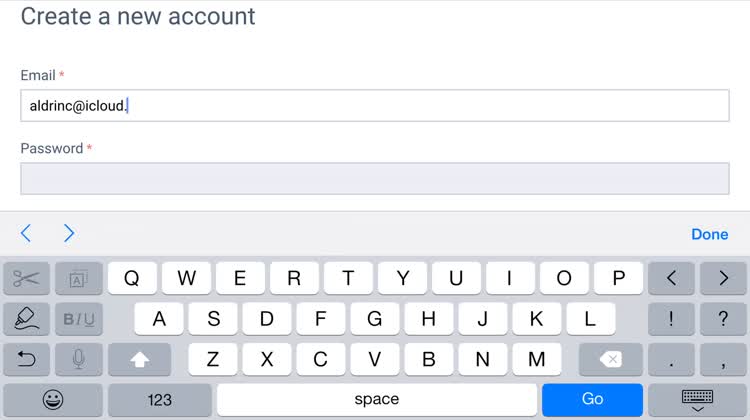
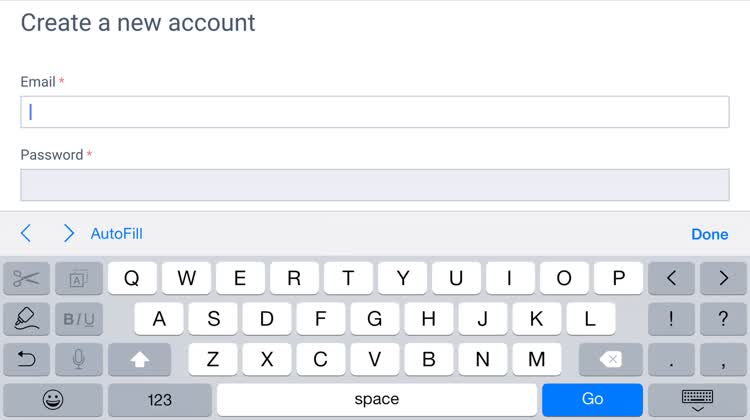
If you’re creating a new account, you may manually enter your information or tap AutoFill just above the keyboard to automatically fill out fields with information from your entry in the Contacts app. Then, when filling out the password field, you can assign your own password and then tap Save Password on the pop-up menu to save you new login data in your iCloud Keychain.
Alternatively, you may tap Suggest Password to have Safari randomly generate a password for you. Tap Use Suggested Password on the pop-up menu to use the password and automatically save it in your iCloud Keychain.
Managing your iCloud Keychain
Contrary to general belief, there’s a way to access a list of the passwords saved in your iCloud Keychain. Just go to the Passwords & AutoFill section of the Settings app — as shown above, this is done by going to Settings > Safari > Passwords & AutoFill — and then tap the option labeled Saved Passwords.
Don’t worry: Not anyone can simply go where you want to go. You’ll actually be prompted to enter your device passcode (not your iCloud Security Code) before you can access your list of saved passwords.

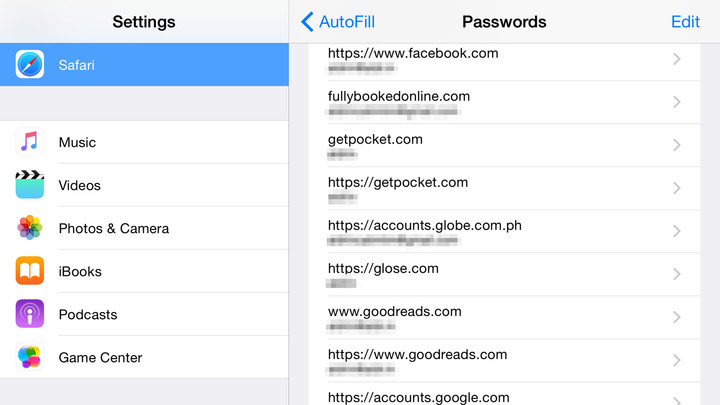


Once you’re in the list view, you can tap on an item to view its details, including the site name and its associated username and password combination.
Neither the username nor the password can be changed in the details view. If you wish to change either or both, you need to log in to the site in Safari and save your new login data from there.
If you want to delete something, just swipe left on an item in the list view and then tap the Delete button. If you want to delete a number of items, tap the Edit button, select the items you want to remove, and then tap the Delete button.
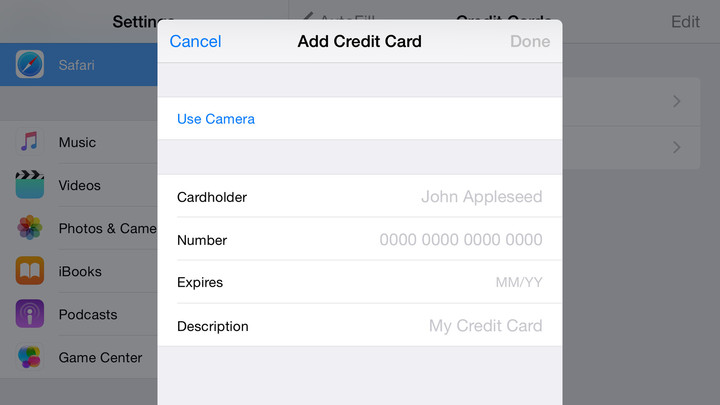
You can also access a list of your saved credit cards by tapping the option labeled Saved Credit Cards in the Passwords & AutoFill settings section and entering your device passcode. As with saved passwords, you can view the details of and delete your saved credit cards. But unlike with passwords, you can actually edit the details of your saved credit cards and even add new credit cards (by using your device’s camera to scan cards or manually entering card information) right within the Settings app, instead of doing so in Safari.


Logging in with iCloud Keychain
Once a username and password combination is stored in your iCloud Keychain, it’s automatically entered in the login form when you visit its associated website in Safari. You don’t have to do anything to invoke it — a testament to Apple’s well-known penchant for “it just works” seamlessness and simplicity.
You can tell a form field has been autofilled with iCloud Keychain information if its background has turned to yellow.
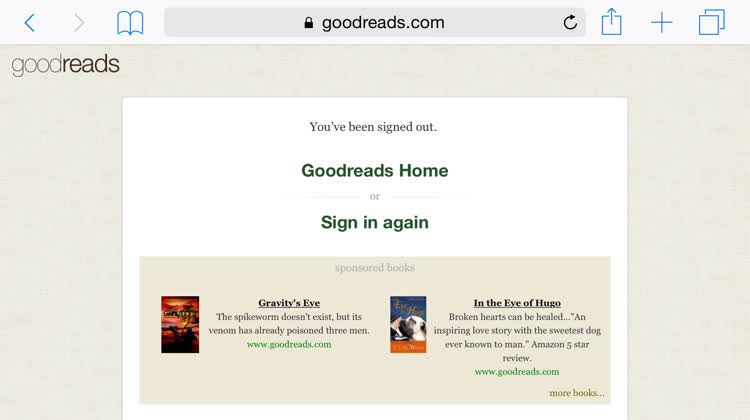
With your login credentials autofilled accordingly by iCloud Keychain, you just have to tap the login button and you’re good to go.
iCloud Keychain works on Mac too
Surprise, surprise. Being a product of Apple, which prides itself on the synergy and continuity between its devices, iCloud Keychain works with Mac as well as iOS. On devices running OS X Mavericks 10.9 or later, iCloud Keychain can be enabled to also make logging in to sites and filling out forms in Apple’s Safari Web browser practically effortless, with your data synced across all of your connected and approved iOS and Mac devices.
With iCloud Keychain duly enabled on your Mac, you can have login, online shopping and identity forms autofilled in Safari for Mac without your having to do anything special. You can also have iCloud Keychain generate longer and stronger passwords for you when creating new accounts or updating old ones. Rest assured that whatever changes you make to iCloud Keychain on your Mac gets pushed to the cloud and synced onto your other Apple devices, whether Mac or iOS.
One password to remember them all
1Password - Password Manager and Secure Wallet by AgileBits
 1Password
Apple’s iCloud Keychain makes for a simple yet effective approach to password management. This is especially true if you frequently or, better yet, exclusively use Safari for logging in to websites and doing online shopping.
Just because iCloud Keychain is from Apple doesn't mean it's the best password manager
But wouldn’t it be nice to have all of your website logins and credit card details viewable and editable in one place along with your top-secret notes, clusters of related personal information, and various other types of sensitive data? And wouldn’t be nice to be able to access your saved passwords from apps other than Safari? Further, wouldn’t it be nice to have your data protected by a security layer like a separate password in addition to your device’s passcode lock?
Yes, yes and yes, you say? Well, you’re most probably in want of a third-party solution to function as a password manager in lieu of or along with iCloud Keychain.
There’s a great deal of third-party password managers available today. One of the best-known among them is LastPass. Another is Dashlane. But we here at AppAdvice are all but unanimous in our partiality for 1Password, whose impressive feature set and easy-to-use interface are more than enough for us to single it out in this guide as a worthy alternative to iCloud Keychain.


Developed by AgileBits, 1Password is a standalone app that functions as a virtual vault for storing login credentials, credit card information, identity data, secret notes, and more. It’s also a random password generator, with different parameters for creating more secure passwords. Most notably, it boasts a master password feature behind which all of the stored data are encrypted and stored.
Getting started with 1Password
Unlike iCloud Keychain, 1Password is not baked right into iOS. Rather, it’s a standalone app. So to set up 1Password on your iOS device, you first have to install the app from the App Store. Go ahead and do it: 1Password is free to download.
The 1Password app for iOS is compatible with iPhone, iPod touch, and iPad running iOS 8.0 or later.
After installing the app, follow these steps to get started with 1Password.

How to set up 1Password on iOS
Launch 1Password from the home screen of your iOS device. The app will then show its setup wizard.
The setup wizard of 1Password is made up of a series of cards denoting separate steps of the process. Just swipe left on the current card or tap the right-pointing button to proceed to the next card.
Tap “Create new vault.”
Assign a Master Password.
What is a Master Password? You need your Master Password to gain access to your saved data in 1Password. Be sure to make your Master Password strong and unique, but not so strong and unique as to make it impossible for you to remember it. If you forget it, there’s no way to recover it and, by extension, your data. To help you remember your Master Password, you’re also required to …
Enter a password hint.
Be sure not to make your hint so obvious that other users can easily guess what your Master Password is.
Swipe left to get to the Security card.
On the Security card, you can set 1Password to use Touch ID fingerprint unlocking on compatible devices (turn on the switch for “Touch ID”), automatically lock after a certain period of inactivity (tap “Auto-lock after” to choose a duration) and/or every time you leave the app (turn on the switch for “Lock on exit”).
It’s up to you to specify how secure and convenient you want 1Password to be. You can always reconfigure the app’s combination of security and convenience in the app’s Security settings.
Swipe left to get to the Keep In Sync card.
On the Keep In Sync card, you can choose to sync your data via iCloud or not. If you want to, keep the switch for iCloud Syncing turned on. If not, turn it off and then you can choose to sync via Dropbox or Wi-Fi in 1Password’s settings later on.
The Keep In Sync card also lets you enter your email address to sign up for the official 1Password tips-and-tricks newsletter. This is completely optional.
Tap the “Let’s go!” button and wait for 1Password to finish its configuration.
Enter your newly created Master Password and tap the “Go” button.
Saving passwords in 1Password
The 1Password app allows you to store different types of information. Foremost among these, of course, is the login item, which basically includes the username and the password you use to log in to a website. Here’s how you can save a login item in 1Password.

How to save passwords in 1Password
Launch 1Password from the home screen of your iOS device and unlock it with your Master Password or Touch ID.
Tap the Categories tab on the bottom bar.
Tap the plus (+) button at the top right corner.
Tap Login on the list of available categories.
Enter the name of your login item, e.g. the name of the associated website.
As you type, the app’s list of popular sites is filtered accordingly. Tap the appropriate website in the filter results. If you don’t see the website, just finish typing the name and then tap the arrow button.
Enter the username or email address for the site and then tap the arrow button.
Enter or create your password. You can also tap the Generate New Password option to have 1Password randomly generate a password for you.
If you’re saving a login item for an unlisted site, you need to enter the site’s Web address. But if it’s for a listed site, proceed to the next step.
Tap the Save button at the top right corner.
And that’s it. Your login item is now saved in 1Password.
In addition to login items, 1Password lets you save credit cards for easier online shopping, identities for quicker filling out of forms, secure notes for safer note-taking, and more. As with login data, just tap your desired category when adding a new item and fill in the required fields to save it in 1Password.
Managing your 1Password data
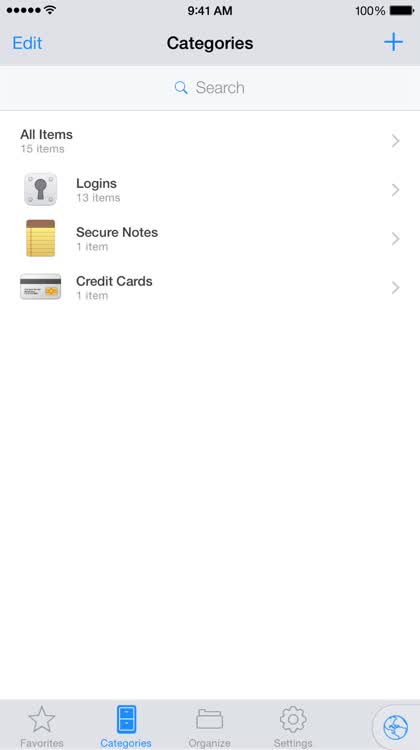
Managing stored data in 1Password is pretty much as easy as saving them. The Categories tab makes this so with its clear categorization of saved logins, credit cards, identities, notes, and more. Just select a category and tap an item to view its details and access several management options.
You can edit the item, favorite it to make it quickly accessible from the Favorites tab, or share it with someone you trust through a variety of plain or encrypted channels.
What’s more, if you’ve upgraded to 1Password’s Pro version (see Pro section below), you can go to the Organize tab to sort your items into folders and make them easily searchable with tags.
Syncing your 1Password data
With 1Password, you can sync via iCloud, Dropbox, or even just Wi-Fi
Of course, 1Password features syncing to make your saved data accessible across your devices.

During the setup process, you’re given the option of syncing via iCloud. If you choose to keep the iCloud syncing turned on, 1Password by default syncs through Apple’s cloud service. If you turn it off, you can enable one of two alternative syncing options in 1Password’s Sync settings.
To access these settings, tap the Settings tab and tap the option labeled Sync. Then, tap Sync Service to see the current sync method or choose a new sync method.
The app supports three sync methods: iCloud, Dropbox, and Wi-Fi.
If you choose to stick with iCloud, keep in mind that it works only with Apple devices, i.e., iOS and Mac devices. So when switching to Android or Windows, you may not be able to access your 1Password data.
If you want a sync method that works with all devices, choose Dropbox.
But what if you don’t want a cloud service to sync your data? Well, you can opt to sync over your secure Wi-Fi network instead. But here’s the catch: Wi-Fi syncing works only between a single Mac or PC and one or more iOS devices, and since it doesn’t operate over the Internet, it works only between devices that are on the same local network.
Logging in right within 1Password
You can log in and autofill forms with the data you’ve saved in 1Password right within 1Password itself, using the app’s built-in Web browser called 1Browser.

How to use 1Browser to log in from your login items
Launch 1Password from the home screen of your iOS device and unlock it with your Master Password or Touch ID.
Tap the Categories tab on the bottom bar.
Tap Logins on the list of categories.
Select the login item you want to use.
On the login item’s details view, tap the Web address.
The preceding steps constitute just one way of getting to the details view of a login item. You can get to it in other ways: through the Favorites tab or through the Organize tab, for example.
The website will be loaded in 1Browser and your username and password will be automatically filled in.
If 1Browser fails to automatically fill in your login credentials, tap the key icon on the bottom bar and tap the item with which to fill in the login form.
Tap the login button on the webpage.

How to surf and autofill the Web with 1Browser
Launch 1Password from the home screen of your iOS device and unlock it with your Master Password or Touch ID.
Tap the globe icon at the bottom right corner to open 1Browser.
Enter the address of a website or a search term in the “omnibar.”
Browse as you normally would. When you arrive at a webpage with a form that requires login, credit card or identity information, tap the key icon on the bottom bar and select the item you want to automatically fill the form with.
Tap the login or save button and continue browsing.
Using 1Password in other apps
Outside the 1Password app, you can log in with your 1Password data to websites in Safari and even to other apps. What’s more, you can create login items from Safari and other apps. This is possible thanks to the 1Password share extension, which works with Apple’s Web browser and other apps that have been updated with support for the 1Password API in iOS 8.


How to enable 1Password's share extension
Launch Safari from the home screen of your iOS device.
Tap the share button.
The share sheet will pop up. Swipe left on the bottom row of the share sheet to get to its rightmost part.
Tap the button labeled More in the bottom row.
Be sure to tap the More button in the bottom row, not the More button in the top row.
In the list of activities, find 1Password and flip its switch to turn it on.
If you like, you can tap and hold the three horizontal lines beside 1Password to move it to your desired position. You may want to place it at or near the top to make it more quickly accessible from the share sheet.
Tap Done.

How to autofill with 1Password in Safari
Launch Safari from the home screen of your iOS device.
Go to the website you want to visit.
When you arrive at a webpage with a form that needs to be filled out with login, credit card or identity information, tap the share button.
Tap 1Password on the share sheet.
Unlock 1Password with your Master Password or Touch ID.
Tap the appropriate login, credit card or identity item for the form you want to fill out.
The form fields are then filled in accordingly, automatically. Tap the appropriate button to continue browsing, e.g. “log in,” “place order,” or “continue.”

How to add login items to 1Password from Safari
Launch Safari from the home screen of your iOS device.
Navigate to the login page of the website you want to visit.
Enter your username and password, and then tap Done right above the keyboard.
Tap the share button.
Tap 1Password on the share sheet.
Unlock 1Password with your Master Password or Touch ID.
Tap the option labeled New Login. A login item will then be automatically created in 1Password with all of the pertinent details already filled in.
Tap Save.
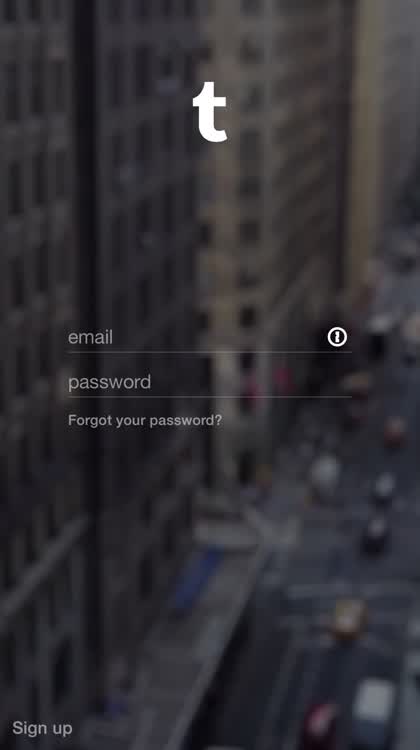
How to use 1Password to log in to other apps
Launch the app you want to use from the home screen of your iOS device.
Navigate to the app’s login screen by, for example, tapping the Log In button.
Look for the 1Password button on the login screen and tap it.
If you don’t see the 1Password button, this means that the app hasn’t been updated with 1Password integration.
The share sheet will then pop up. Tap the 1Password button on the share sheet.
Unlock 1Password with your Master Password or Touch ID.
Tap the appropriate login item for the app.
The login form is then automatically filled in with your username and password. If the app doesn’t automatically sign you in, tap the appropriate button to continue, e.g. “Log in,” “Next,” or the Go button on the keyboard.

How to create new 1Password login items from other apps
Launch the app you want to use from the home screen of your iOS device.
Navigate to the app’s sign-up screen by, for example, tapping the Sign Up button.
Enter all of the required information except for the password.
Tap the 1Password button on the sign-up screen.
If you don’t see the 1Password button, this means that the app hasn’t been updated with 1Password integration.
The share sheet will then pop up. Tap the 1Password button on the share sheet.
Unlock 1Password with your Master Password or Touch ID.
A new login item will then be automatically created by 1Password with your username already filled in. You can manually enter a password of your own making. Alternatively, and more preferably, you can tap Generate New Password to have 1Password randomly generate a strong and unique password for you.
If you choose to randomly generate a password, you can adjust the slider labeled Length to customize how long you want the password to be. Additionally, you can tap Show Password Recipe to access more password customization options.
Once you’re OK with your new login item, tap Save.
The sign-up form is then automatically filled in with your newly created password. If the app doesn’t automatically sign you in, tap the appropriate button to continue, e.g. “Sign Up,” “Next,” or the Go button on the keyboard.
1Password for Apple Watch
Have an Apple Watch? Then you might want to use 1Password on it, because you actually can — unlike with iCloud Keychain, which is inaccessible on Apple’s wearable device.
The Apple Watch extension of 1Password offers a way for you to more quickly and easily view oft-accessed information that are not so sensitive that they need to be hidden behind your Master Password or Touch ID at all times, but are sensitive enough that you wouldn’t want them to be seen in plain sight. For example, your locker combination, the code to your garage door, a one-time password, or the details of your credit card.
Getting started with 1Password for Apple Watch is a cinch. Just be sure you have all that you need.
Aside from an Apple Watch, what you need to enable 1Password for Apple Watch is the 1Password app with the Pro upgrade unlocked, a compatible iPhone (i.e., iPhone 5 or newer) duly paired with your Apple Watch (through the Apple Watch app on iPhone), and, for security reasons, a device passcode and/or Touch ID enabled on the iPhone.
How to enable 1Password for Apple Watch
Launch 1Password from the home screen of your iOS device and unlock it with your Master Password or Touch ID.
Tap the Settings tab.
Tap the option labeled Apple Watch.
Turn on the switch for Enable Apple Watch.
While it’s optional, it’s recommended that you assign a PIN code for unlocking 1Password on your Apple Watch to apply an additional layer of security.

How to make 1Password items viewable on Apple Watch
Launch 1Password from the home screen of your iOS device and unlock it with your Master Password or Touch ID.
Navigate to the login item, credit card or secure note you want to make accessible on your Apple Watch.
Tap the item to go to its details view.
Tap the option labeled Add to Apple Watch.
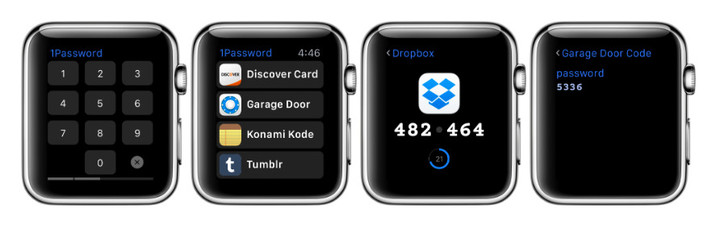
How to view 1Password items on Apple Watch
Tap the 1Password icon on your Apple Watch.
Enter your PIN code (if any).
Find the item you want to view by scrolling through the list of items you’ve made viewable on Apple Watch and tap it.
Be careful what you make viewable on your Apple Watch. DO NOT include such ultra sensitive information as your email and online banking login credentials.
1Password for Mac
The 1Password solution lends itself well to use on mobile devices, including iPhone, iPad, and Apple Watch. But it also makes for a more than worthwhile password manager on desktop, particularly on Mac.
To use 1Password on your Mac, you first have to, of course, install 1Password for Mac. And to do that, you can either get the 1Password app directly from the AgileBits store or download it from the Mac App Store.
What’s the difference? The version from AgileBits comes with a free 30-day trial, while the version from the Mac App Store requires a download fee right away. The former is all but instantly updated as patches and improvements become available, while the latter is subject to Apple’s review and approval. Also, the AgileBits store version supports syncing via Dropbox, Wi-Fi, another cloud-based solution or local app via folder sync, but not iCloud sync, which is available only on the Mac App Store version of 1Password.
Our advice? Especially if iCloud sync is essential to you, try 1Password for Mac for free first using the AgileBits store version and then switch to the Mac App Store version once you’ve decided that 1Password is for you.
Whichever version of 1Password you choose to install on your Mac, just follow the onscreen instructions and respond to the prompts accordingly to set up 1Password on your computer.

1Password for Mac notably features Security Audit for pointing out vulnerable passwords.
Once installed, you can expect to tap into the many features of 1Password for Mac (which, unsurprisingly, are similar to, if not exactly the same as, the ones in 1Password for iOS) through the main app itself, its menu-bar companion app, or through its official extensions for Web browsers including Safari.
The Mac edition of 1Password also offers a feature called Watchtower. This checks your login items and warns you of known vulnerabilities in the ones for compromised sites and services so that you can change your passwords for them. Watchtower is part of the Mac app’s broader Security Audit feature, which also calls attention to weak, duplicate and old passwords.
1Password pricing and platform availability
Unlike iCloud Keychain, which is a completely free service from Apple, 1Password is a free-to-try product. Granted, the version of 1Password that’s available from the Mac App Store already comes with all features unlocked and therefore demands an immediate download fee, which currently stands at $49.99. But both 1Password for iOS, which is available from the iOS App Store, and the AgileBits store version of 1Password for Mac are offered for initial download free of charge.
Unlike the completely free iCloud Keychain, 1Password is a free-to-try product
For 1Password for iOS, the basic free version lets you create and edit login, credit card, identity and secure note items, and mark them as favorites. But for a one-time in-app purchase of worth $9.99, you can upgrade to the app’s Pro version, thereby gaining access to additional features including new item categories, custom fields, Apple Watch support and folder and tag organization.
For the AgileBits store version of 1Password for Mac, all of its features are free to try for 30 days. After the trial period, you’ll no longer be able to add new items if you’ve already added at least 20 items, unless you purchase a license starting at $49.99.
It’s worth noting that 1Password is available on Android and Windows, in addition to iOS and Mac. Apple’s iCloud Keychain, on the other hand, is supported — unsurprisingly — on Apple’s iOS and Mac platforms only.
You shall not pass!
Choose a password manager to use
For starters, iCloud Keychain does the job and does it well. It’s so convenient and tightly integrated into Safari that, after the initial setup and storage of data, you hardly notice it’s there doing its thing, automatically filling in logins and other forms for you often without your having to lift — or tap down — a finger. It even remembers passwords for Wi-Fi networks you’ve connected to from one device so that you won’t have to enter them when you connect from another device. And it’s absolutely free.
Unfortunately, use of iCloud Keychain is essentially exclusive to Safari, Apple’s Web browser, and to iOS and Mac, Apple’s operating systems. Saving and editing data in iCloud Keychain are also far from being among Apple’s most efficient and intuitive prescribed procedures. Moreover, once you unlock your device, access to your saved logins and credit cards is available to anyone using your device, since iCloud Keychain doesn’t require a master password or a similar safeguard.
Whichever you choose, the most important thing is that you do end up choosing and using a password manager
If you want greater flexibility as well as greater security, albeit at a greater price if you’re in for the long haul, you should consider using a dedicated third-party password manager like LastPass, Dashlane, or our recommended choice, 1Password.
Whichever you choose, the most important thing is that you do end up choosing and using a password manager. It’s for your own good. So choose now, start using your weapon of choice, continue using it, commit to using strong and unique passwords, and rest assured that your online security is kept tight by a virtual entity that’s at the ready to thwart intruders and say, “You shall not pass!”
